Tuesday, February 18, 2020

ABAP Loop Types and Control statements

ABAP programming language provides the following types of loop to handle looping requirements.
S.No.Loop Type & Description
1WHILE loop
Repeats a statement or group of statements when a given condition is true. It tests the condition before executing the loop body.
2Do loop
The DO statement is useful for repeating particular task a specific number of times.
3Nested loop
You may use one or more loops inside any another WHILE or DO loop.

Loop Control Statements

Loop control statements change execution from its normal sequence. ABAP includes control statements that allow loops to be ended prematurely. It supports the following control statements.
S.No.Control Statement & Description
1CONTINUE
Causes the loop to skip the remainder of its body and starts the next loop pass.
2CHECK
If the condition is false, then the remaining statements after the CHECK are just ignored and the system starts the next loop pass.
3EXIT
Terminates the loop entirely and transfers execution to the statement immediately following the loop.

How to lock / save your data objects from multiple user access at a time

Lock Object is a feature offered by ABAP Dictionary that is used to synchronize access to the same data by more than one program. Data records are accessed with the help of specific programs. Lock objects are used in SAP to avoid the inconsistency when data is inserted into or changed in the database. Tables whose data records are to be locked must be defined in a Lock Object, along with their key fields.

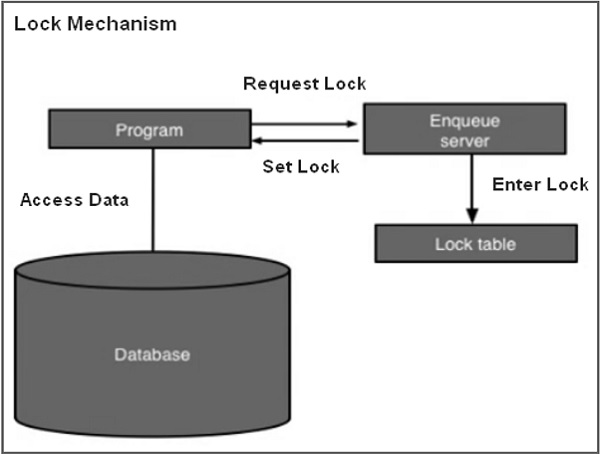
Lock Mechanism

Following are the two main functions accomplished with the lock mechanism −
  • A program can communicate with other programs about data records that it is just reading or changing.
  • A program can prevent itself from reading data that has just been changed by another program.
lock request is first generated by the program. Then this request goes to the Enqueue server and the lock is created in the lock table. The Enqueue server sets the lock and the program is finally ready to access data.
Lock Request

Creating Lock Objects

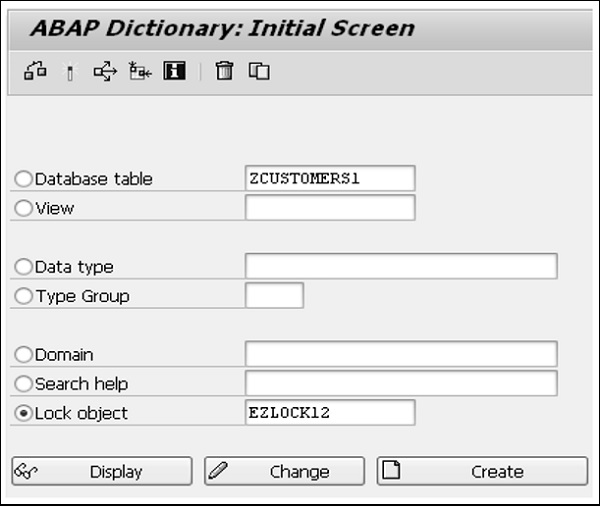
Step 1 − Go to transaction SE11. The following screen opens.
Creating Lock Objects
Step 2 − Click ‘Lock Object’ radio button. Enter the name of lock object starting with E and click the Create button. Here we use EZLOCK12.
Step 3 − Enter the short description field and click on Tables tab.
Step 4 − Enter the table name in Name field and select the lock mode as Write Lock.
Step 5 − Click on Lock parameter tab, the following screen will appear.
Lock Parameter Tab
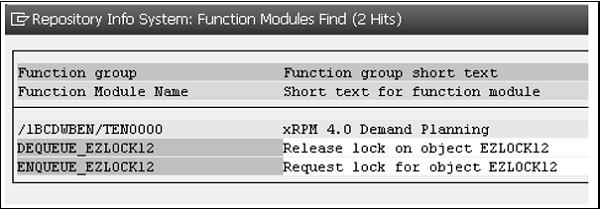
Step 6 − Save and activate. Automatically 2 function modules will generate. To check function modules, we can use Go to → Lock Modules.
Step 7 − Click Lock Modules and the following screen will open.
Lock Function Modules
The lock object is created successfully.
The key fields of a table included in a Lock Object are called lock arguments and they are used as input parameters in function modules. These arguments are used to set and remove the locks generated by the Lock Object definition.